Editing a Content Box
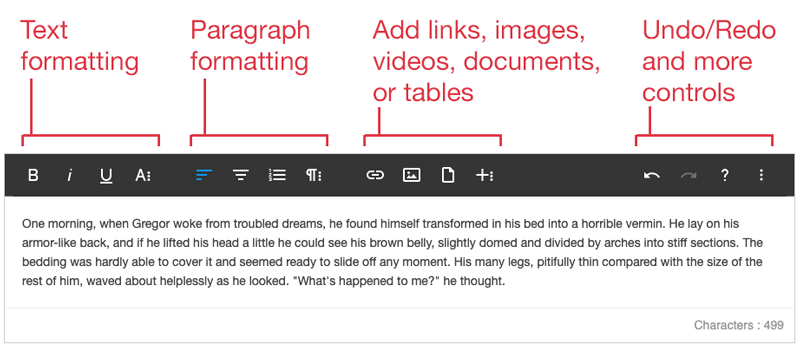
It is very easy to edit any of the content in your website. Placing your cursor in one of the content boxes on your site brings up the available edit controls for that box. See below.
Inserting a Link
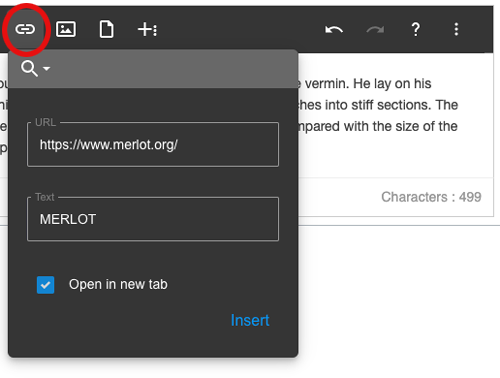
Turn a word, phrase, or image into a link, by highlighting it, and clicking the Insert Link button. Enter the URL of the link, the text to display, and whether or not you'd like the link to open in a new tab. Then click Insert.
Linking to another page or section of your site
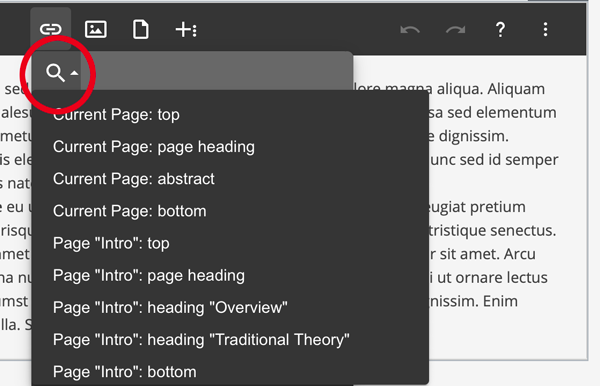
You can also link to an anchor on the same page or another page within your site. After clicking the Insert Link button, click the Search dropdown and select the part of the page you'd like to link to.
Adding an Image
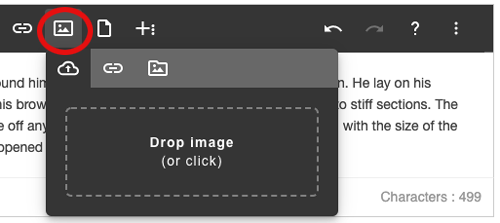
To add an image to a content box, place your cursor where you’d like the image to be and click the Insert Image button. You can then drag an image into the dialogue box or click the box to locate the image on your computer. You can also add an image already online using the image's URL, or browse any previously uploaded images within this dialog box. Acceptable file types include JPEG, PNG, and GIF.
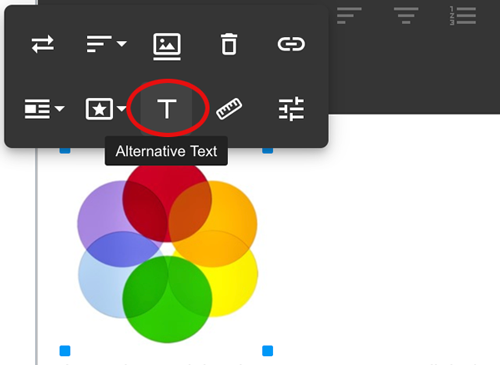
Once you've added your image, you can add alternative text (describing the image for screen readers) by clicking the image to bring up the Edit Image controls, then clicking the Alternative Text ("T") icon. All images on your site should include alternative text for accessibility.
Uploading a Document
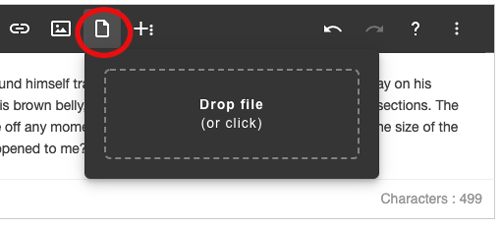
To upload and link to a document, place your cursor where you'd like the document link to be and click the Upload File button. You can then drag the file you'd like to add into the dialogue box or click the box to locate the document on your computer. Acceptable file types include MS Office file types (Word, Excel, PowerPoint), PDF, RTF, TXT, CSV, and SAV.
Adding a video
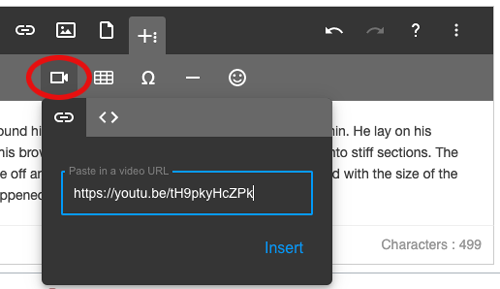
To add a video to a content box, place your cursor where you'd like the video to be and click the Insert Video button. You can then either add the video URL, or click the Embed tab of that dialog box and enter the embed code. Note that videos can only be added from a video streaming service (like YouTube or Vimeo), as Content Builder does not allow uploading video files directly.
Inserting a Table
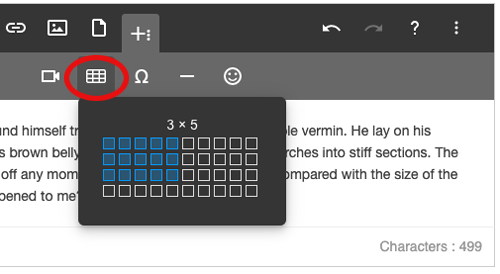
To insert a table into your content box, place your cursor where you’d like the table to be, click the Insert Table button, and select the number of rows and columns you’d like in your table.
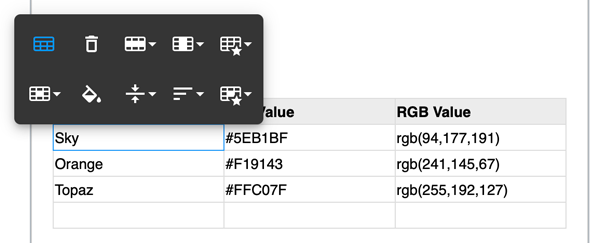
To edit the structure or styles of your table, place your cursor in one of the cells or select a group of cells, and use the controls that appear above your cursor.
